Since we couldn’t arrange the famous O-trek in Torres del Paine, we looked for a suiting alternative. The Cerro Castillo trek, though not as long, provides the more adventurous hiker with a huge variety in landscapes. Best part? Except for the campsites, you can spend a day and only meet a few other hikers.
First things first
There are a few things you need to know before you start this hike. It is not for the faint of heart. There are few good maps available and declines can be so steep that people with vertigo will contemplate calling the helicopter to evacuate them from the mouintain. If there would be cell phone reception, that is.
For this trek you need equipment that can withstand Patagonian weather, all the food you need for four days and of course a little extra and please don’t forget your trekking poles. One last important thing: Even though water is easy to find and drinkable, make sure to have a bottle ready for day three, where there is a fairly big gap between two water points and a big mountain in between.
The markings for the Cerro Castillo route are not always clear. Look out for: Yellow triangles, orange triangles, white poles with red tops (sometimes made of fabric) and, especially while decending on day 3, look out for the little heaps of stones that other hikers and we left for you.
This being said, we will try to help you prepare with the information on this page.
What is Cerro Castillo
Already dubbed “The new Torres del Paine”, Cerro Castillo is a national park located in the south of Chile. It is not very easy to reach and therefore a lot less crowded than it’s big brother Torres del Paine. The 4 days 3 night trek will guide you past forest, swamps, rivers, snow, glaciers and an amazingly blue lake, before ending in the village Villa Cerro Castillo. The name comes from the shape of the mountains that tower over the trek, strongly resembling castles.
What to bring
We came prepared and we strongly recommend you do too. Patagonian weather is no joke and even though we were extremely lucky with 4 days of clear skies, the nights were cold. The list below is a combination of our gear and the pointers provided by CONAF, the Chilean organization managing the national parks. It is advised to pack light but include essentials:
- A/B shoes, as fast drying as possible
- Flipflops (for rivier crossings or air your feet after the hike)
- 1 or 2 pairs of fast drying socks
- Trekking poles, min. 1 per person (available in outdoor shops in Chili)
- Two layered tent
- Sleeping mat (-5ºC)
- Sleeping bag (Comfort temperature -5ºC)
- Knife
- Cutlery + Plate + Pot
- Stove (fires are not allowed anywhere)
- Food for 4 days + 1 or 2 extra
- Emergency energy bars and / or chocolate
- Raincoat
- Sunscreen SPF 50
- Fast drying trekking pants
- Fast drying shirt
- Fleece / Sweater
- Thermo layer
- Hat (for the cold, as well as for the sun)
- Sunglasses
- Backpack (for trekking!)
- (Head)Light
- Steel water bottle and large plastic one to stock up
This is by no means the ultimate list but we think it is at least a good start.
How to get to the Cerro Castillo hike starting point
There are two ways to do this trek. The first is starting at Las Horquetas and work your way to Villa Cerro Castillo and the other is to start in the village and backtrack. All the maps start from Las Horquetas and that is how we did it.
If you start from Coyhaique, take a bus or hitch hike in the direction of Cochrane or Villa Cerro Castillo. You can ask the driver to be droped off at Las Horquetas, which is not more than a U-turn in the Carretera Austral. You can recognize it by the fence leading into the park. Pay attention though, it’s very easy to miss. The starting point is before you reach Villa Cerro Castillo
If you start from Cochrane or Chile Chico, simply take a bus to Coyhaique and ask the driver the same question. This time, the starting point is a little after you pass Villa Cerro Castillo.
Entering the park will cost you 5000 CLP per person (january 2018) and camping is included in this price. There are stories of being able to arrive at the park before the ranger does and thus avoid paying the fee. However, we stronlgy recommend paying, since you help maintaining the park, are a registered visitor (handy in case you get lost) and this is the last point to obtain a map.
If you already know that you will revisit a place, that would be the time to leave unneccesary stuff behind to pick it up later. We did not have that chance and therefore carried everythingh we owned up the mountain, including our Lonely Planet, E-reader, running shoes and yes, a dress.
Where to camp and how to get there
There are several campsites to choose from. Since the coordinates on the map we got seemed different than the ones we are used to, we will provide ours here. Make sure to check for yourselves if this seemes logical and be advised that these are not spot on.
The first day is the easiest of the four. You start by following a 4×4 track and eventually, after a big swamp on your left, turn south and leave the 4×4 track. From there it is a short walk to the first camp but night one, you best stay at Camp 2: -46,0084190, -72,1047960
The reason to prefer this camp over the first, is that day two is hard enough as it is. Day one is fairly easy and sleeping at the second camp will give you a small head start.
The second day you start by following the river and take a small detour through the forest to get up the mountain. There you cross a snowy pass. Leave early because the wind can get rough up there by midday. Walk down and enter the forest again. After crossing the river you are at camp 3: -46,0566670, -72,1525000.
This camp has picknick tables and a latrine so you can choose to spend the night here. We did. In hindsight, we would have liked to walk two extra hours to the next, unofficial and more basic camp (called la Tetera) to again, get a head start. The reason we couldn’t was that we would not have made it before dark. Declines just take a little more time when someone is afraid of heights.
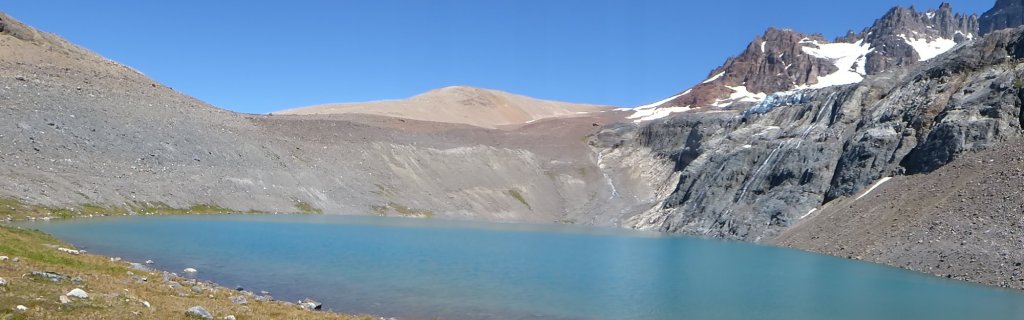
The third day you are either very close to the lagoon or first walk to la Tetera and then walk around the lagoon. The lagoon is the last place you can get water before you cross the mountain at it’s highest point, so make sure you fill up your bottle and extra plastic bottle. We didn’t because we were under the impression that on the other side, we would follow the river again. This lead to a scarcity in water we do not ever want to experience again.
Also, pay attention to the route here, because you may accidentally end up on the day-hikes route and start crossing the wrong mountain. The one to cross for this hike is exactly opposite of the point where you approach the lagoon, coming from la Tetera.
Once you are over the mountain, which took us very long again because of the vertigo, you start decending further and eventually you will find this sign:
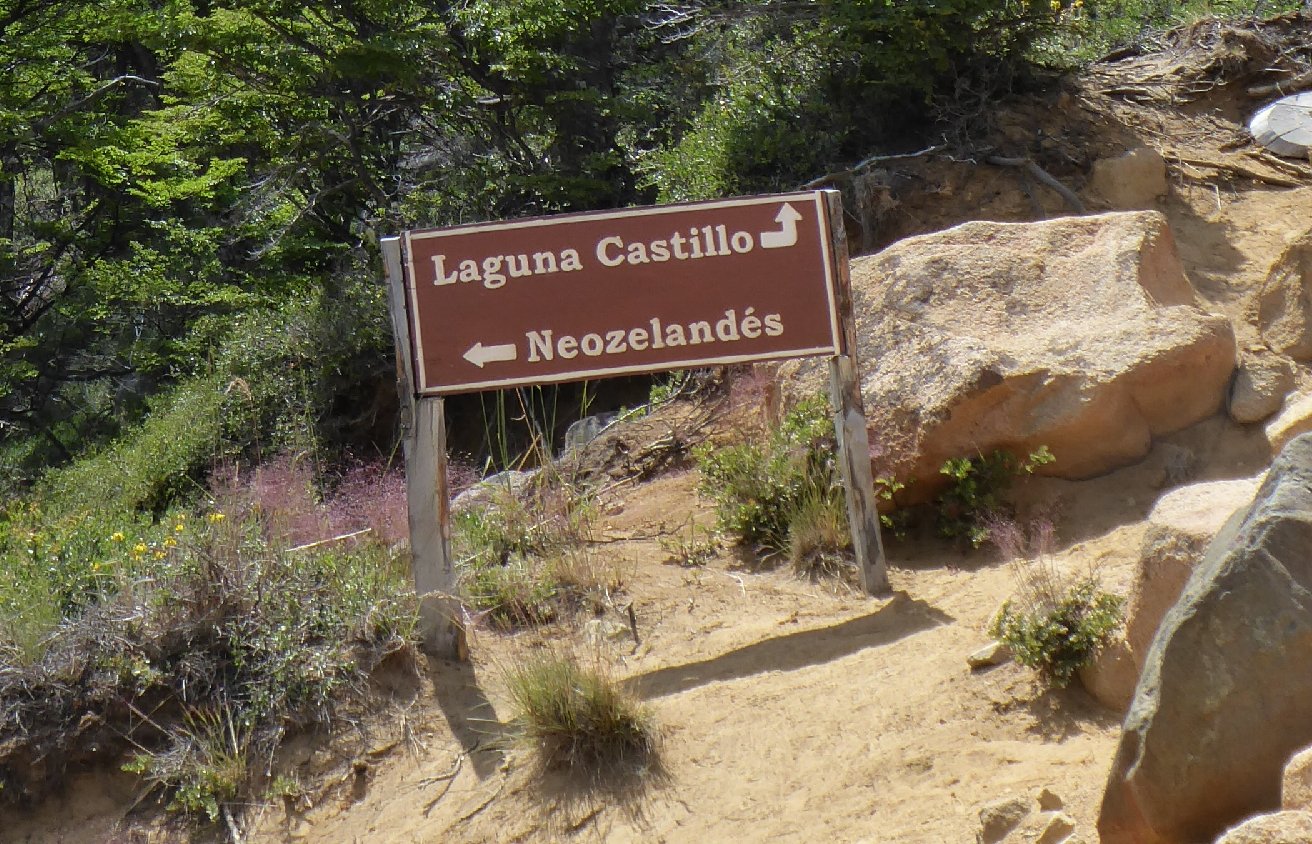
This sign, combined with the map we had, made us believe that to get to the camp, we had to walk away from the sign. Later we heard that almost eveyone else had made the same mistake. So don’t be fooled: The camping for the third night is in the same direction as Camp Neozelandes and can be found here: -46,0738890, -72,2455560.
We would have probably realized our mistake sooner but we were so dehydrated that we kept pushing on to reach water. When we noticed our mistake we backtracked and found Camping Los Porteadores and water. Oh the sweet, sweet water.
On the fourth day, you can leave your tent and walk up to camp Neozelandes for stunning views. We didn’t, because we were still a little shaky from walking 11 hours the day before and another adventure with heights did not appeal to us at that time. Yes, it’s a shame but we had seen so many stunning things by then, we quickly got over it.
When you return, pack up your tent and start the last leg of your adventure. Make sure to enjoy every second you are still in the park because once you reach the road, you have nothing left but 6 boring kilometers towards Villa Cerro Castillo. And beer. Well deserved beer.
If you have any questions about the Cerro Castillo hike, let us know. We are by no means trekking experts but we are willing to answer them as best we can.
And one final piece of advice: Go. Go now before it is overrun by hikers and loses some of it’s charm.
